Call API's With Kotlin-Coroutines In Your Android Application
It's Much Simple Than You Think😉


Before Getting Started I Suggest You Understand What's Actually A Coroutine Jobs Are, Which I Have Discussed In The Previous Blog In This Series. And Make Sure That You Have Included Coroutines Dependency If It's Not Included:
implementation 'org.jetbrains.kotlinx:kotlinx-coroutines-android:1.5.0'
-> Until The Previous Blogs In This Series I Have Shown The Usage And Purpose Of The Kotlin-Coroutines When You Are Getting Started With It, It's Time For Building Something With It😈.
- Let's Build An Android Application With Kotlin-Coroutines In Which We'll Be Using
APITo Show TheRandom Images Of Cat😺.
Pre-requisites Before Moving To Further:
-> Make Sure That You Have Added Volley Library Dependency From Which We'll Be Networking[You Can Use Retrofit Too]
dependencies {
    ...
    implementation("com.android.volley:volley:1.2.0")
}
-> Make Sure You Have Added Coil Library Dependency From Which We'll Be Loading Cat Images😺:
dependencies {
    ...
    implementation("io.coil-kt:coil:1.3.0")
}
-> And Of Course Kotlin-Coroutines Dependency Too:
dependencies {
    ...
    implementation 'org.jetbrains.kotlinx:kotlinx-coroutines-android:1.5.0'
}
-> And Make Sure You Have Added Internet Permission In Your Manifest File So That We Can Make A Network Request Successfully:
<uses-permission android:name="android.permission.INTERNET"/>
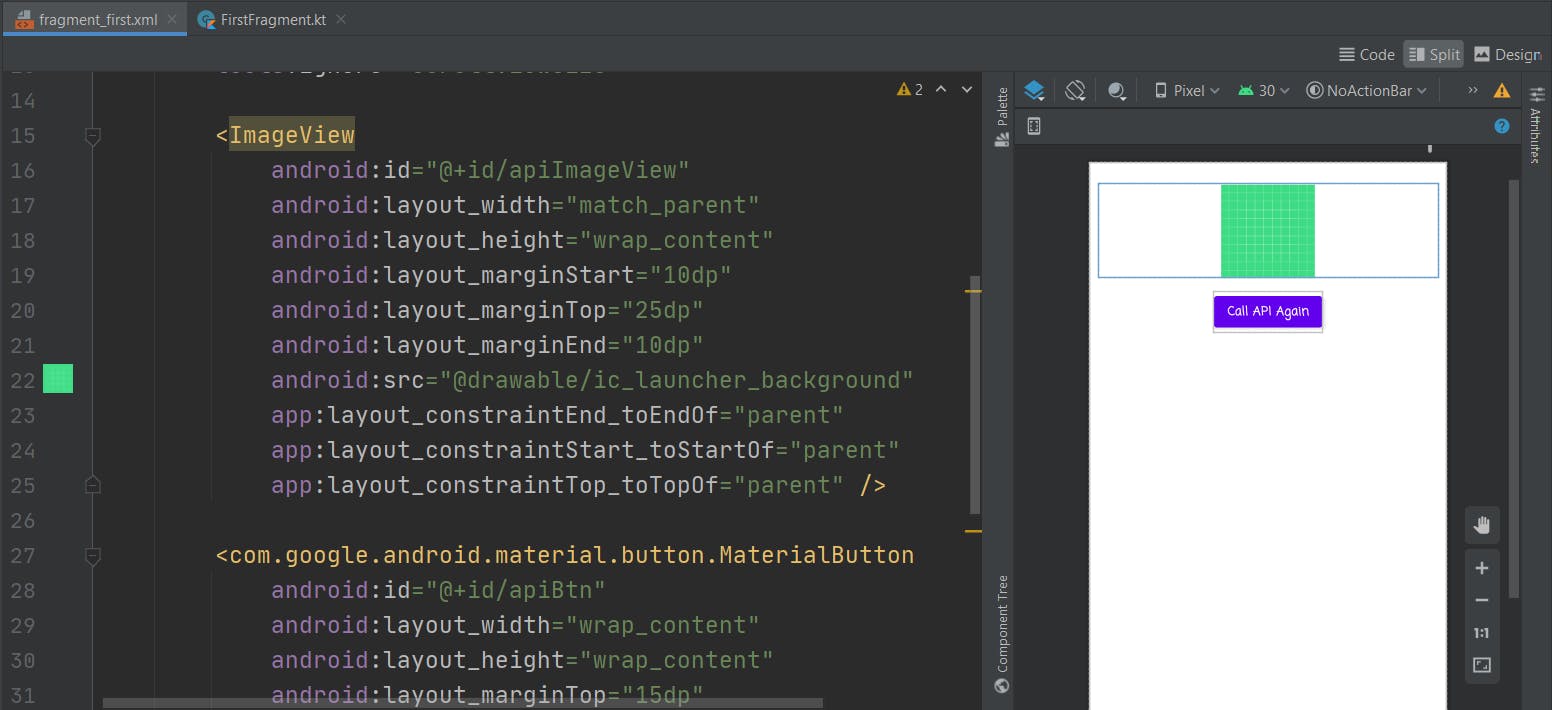
Designing The Layout
We'll Be Adding An
ImageViewAnd AButtonIn Our XML File || Layout File.In Our ImageView, We'll Be Showing The Cat Images Though Coil After Making the API Request Through Volley.
And When Button Will Be Clicked We'll Call Our API Again So That Another Random Image Of Cats😺 Can Be Show In Our ImageView Respectively.
Adding An ImageView:
- Depending On Your Root Layout You Can Change Those Attributes:
<ImageView
            android:id="@+id/apiImageView"
            android:layout_width="match_parent"
            android:layout_height="wrap_content"
            android:layout_marginStart="10dp"
            android:layout_marginTop="25dp"
            android:layout_marginEnd="10dp"
            app:layout_constraintEnd_toEndOf="parent"
            app:layout_constraintStart_toStartOf="parent"
            app:layout_constraintTop_toTopOf="parent" />
Adding A Button:
- Depending On Your Root Layout You Can Change Those Attributes:
<com.google.android.material.button.MaterialButton
            android:id="@+id/apiBtn"
            android:layout_width="wrap_content"
            android:layout_height="wrap_content"
            android:layout_marginTop="15dp"
            android:fontFamily="casual"
            android:text="Call API Again"
            android:textAllCaps="false"
            android:textStyle="bold"
            app:layout_constraintEnd_toEndOf="@+id/apiImageView"
            app:layout_constraintStart_toStartOf="@+id/apiImageView"
            app:layout_constraintTop_toBottomOf="@+id/apiImageView" />
Your Final Layout Code May Look Like This:
<?xml version="1.0" encoding="utf-8"?>
<ScrollView xmlns:android="http://schemas.android.com/apk/res/android"
    xmlns:app="http://schemas.android.com/apk/res-auto"
    xmlns:tools="http://schemas.android.com/tools"
    android:layout_width="match_parent"
    android:layout_height="match_parent"
    android:fillViewport="true"
    tools:context=".FirstFragment">

    <androidx.constraintlayout.widget.ConstraintLayout
        android:layout_width="match_parent"
        android:layout_height="match_parent"
        tools:ignore="ScrollViewSize">

        <ImageView
            android:id="@+id/apiImageView"
            android:layout_width="match_parent"
            android:layout_height="wrap_content"
            android:layout_marginStart="10dp"
            android:layout_marginTop="25dp"
            android:layout_marginEnd="10dp"
            app:layout_constraintEnd_toEndOf="parent"
            app:layout_constraintStart_toStartOf="parent"
            app:layout_constraintTop_toTopOf="parent" />

        <com.google.android.material.button.MaterialButton
            android:id="@+id/apiBtn"
            android:layout_width="wrap_content"
            android:layout_height="wrap_content"
            android:layout_marginTop="15dp"
            android:fontFamily="casual"
            android:text="Call API Again"
            android:textAllCaps="false"
            android:textStyle="bold"
            app:layout_constraintEnd_toEndOf="@+id/apiImageView"
            app:layout_constraintStart_toStartOf="@+id/apiImageView"
            app:layout_constraintTop_toBottomOf="@+id/apiImageView" />
    </androidx.constraintlayout.widget.ConstraintLayout>
</ScrollView>
- Well, That's All For Layout. I Highly Recommend To Play Around With The Layout FIle According To Your Imagination.
Crafting Our Application[Logic]:
- First Things First, Let's Assign A Variable Which We'll Use Further For Requesting:
private lateinit var requestQueue: RequestQueue
Now, We'll be Creating A Function Named apiCall() In Which We'll Be Passing imageView As A Parameter:
private fun apiCall(imageView: ImageView) {

}
- Let's Launch A Coroutine By Implementing
lifecycleScopeScope ThroughIODispatcher As We Are Working With Networking Stuff:
 private fun apiCall(imageView: ImageView) {
        lifecycleScope.launch(Dispatchers.IO) {

        }
}
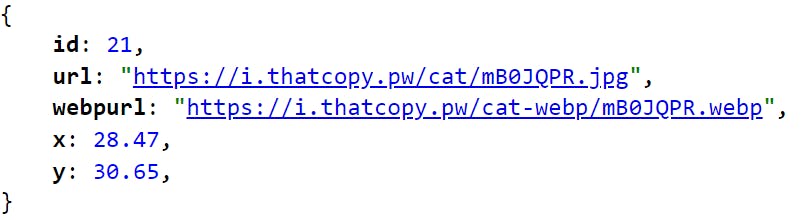
- Moment We Are Waiting For, Simply Request API As You Do In Regular. I'm Gonna Use Volley As I Mentioned Earlier, BTW I'm Using This API Which Is In JSON Format-> thatcopy.pw/catapi/rest:
-> As You Can See That Cat Image's URL Is Set To url Key:
- This Is How Your API Request May Look Like:
private fun apiCall(imageView: ImageView) {
        lifecycleScope.launch(Dispatchers.IO) {
            val apiUrl = "https://thatcopy.pw/catapi/rest/"
            val jsonObjectRequest = JsonObjectRequest(Request.Method.GET, apiUrl, null, {
                val imageURL=it.getString("url") // -> Will Get Our Cat Image URL
                imageView.load(imageURL)
            }, {
                Log.d("API Request Error", "${it.printStackTrace()}")
            })
        }
    }
- After Implementing All Those Request Stuff Let's Add Our
jsonObjectRequestVariable TorequestQueueVariable So That We Can Move Further And YourapiCall()Function SHould Look Like This Now:
private fun apiCall(imageView: ImageView) {
        lifecycleScope.launch(Dispatchers.IO) {
            val apiUrl = "https://thatcopy.pw/catapi/rest/"
            val jsonObjectRequest = JsonObjectRequest(Request.Method.GET, apiUrl, null, {
                val imageURL=it.getString("url") // -> Will Get Our Cat Image URL
                imageView.load(imageURL)
            }, {
                Log.d("API Request Error", "${it.printStackTrace()}")
            })
            requestQueue.add(jsonObjectRequest) // -> Added jsonObjectRequest To requestQueue
        }
    }
- Now, For Loading Image, I Have Created Another Function Named
loadImage()In Which I Have Launched A Coroutine WithapiCall()Function For Networking With API ThroughMainDispatcher So That We Can Work With Main Thread:
private fun loadImage(imageView: ImageView){
        lifecycleScope.launch(Dispatchers.Main){
            apiCall(imageView)
        }
    }
Main Stuff⚡
- Let's Call
loadImage()Function In Main Thread In Which We Have Already Made API Request ThroughapiCall()Function:
loadImage(view.apiImageView)
- Also, We Have To Call
loadImage()Function When Button Is Clicked So That We Can Call API Again And Show Cat Images😺:
view.apiBtn.setOnClickListener {
            loadImage(view.apiImageView)
        }
At Last
- We'll Add Volley In Our
requestQueueVariable Which We Have Created Earlier And AddedjsonObjectRequest:
requestQueue = Volley.newRequestQueue(this.context)
Your Final Kotlin File May Look Like This:
package com.example.name

import android.os.Bundle
import android.util.Log
import androidx.fragment.app.Fragment
import android.view.LayoutInflater
import android.view.View
import android.view.ViewGroup
import android.widget.ImageView
import androidx.lifecycle.lifecycleScope
import coil.load
import com.android.volley.Request
import com.android.volley.RequestQueue
import com.android.volley.toolbox.JsonObjectRequest
import com.android.volley.toolbox.Volley
import kotlinx.android.synthetic.main.fragment_first.view.*
import kotlinx.coroutines.*

class FirstFragment : Fragment() {
    private lateinit var requestQueue: RequestQueue
    override fun onCreateView(
        inflater: LayoutInflater, container: ViewGroup?,
        savedInstanceState: Bundle?
    ): View? {
        val view = inflater.inflate(R.layout.fragment_first, container, false)
        requestQueue = Volley.newRequestQueue(this.context)
        loadImage(view.apiImageView)
        view.apiBtn.setOnClickListener {
            loadImage(view.apiImageView)
        }
        return view
    }

    private fun apiCall(imageView: ImageView) {
        lifecycleScope.launch(Dispatchers.IO) {
            val apiUrl = "https://thatcopy.pw/catapi/rest/"
            val jsonObjectRequest = JsonObjectRequest(Request.Method.GET, apiUrl, null, {
                val imageURL=it.getString("url") // -> Will Get Our Cat Image URL
                imageView.load(imageURL)
            }, {
                Log.d("API Request Error", "${it.printStackTrace()}")
            })
            requestQueue.add(jsonObjectRequest) // -> Added jsonObjectRequest To requestQueue
        }
    }
    private fun loadImage(imageView: ImageView){
        lifecycleScope.launch(Dispatchers.Main){
            apiCall(imageView)
        }
    }
}
- Launch The Application After Successful Build:
- As You Can See That It's Working Like Charm⚡.
Playaround With Coroutines And Other API's😉
Well That's All For Now🙌
Bye🤗